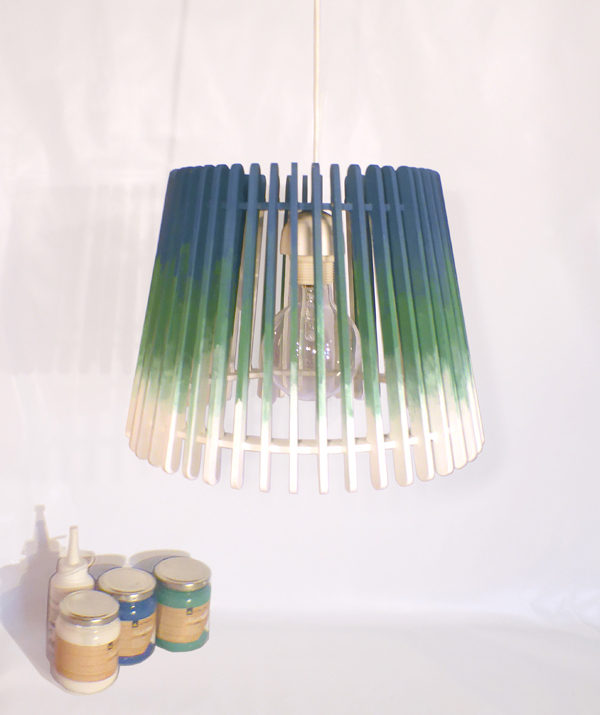
We are going to teach you how to get a gradient with paint on wood, specifically on a lamp of our DIY collection of furniture and decoration, when you see how easy it is you are going to encourage them to make it for sure!
This project was proposed by handbox and we are delighted to participate, so at last we do a tutorial with all the photos of one of our products !!!.
You can see the whole Handbox challenge here
Materials:
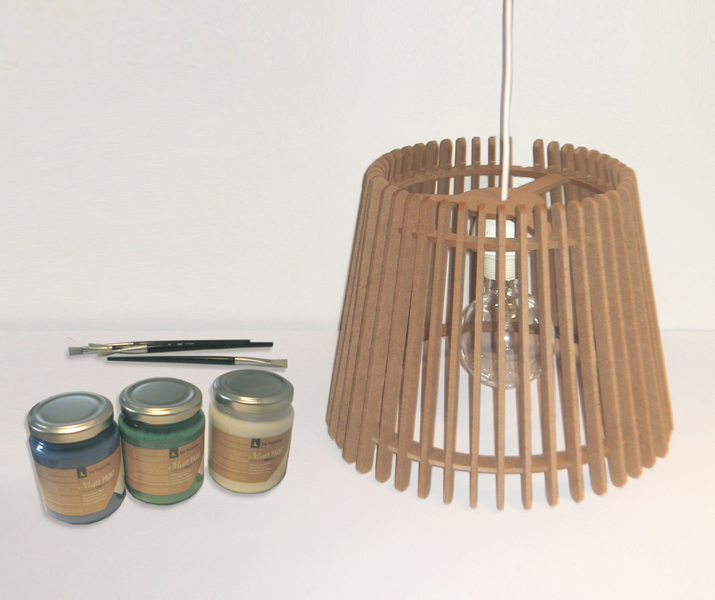
- A lamp of the DIY collection from lagoa.es, made of raw mdf , so you dont need any primer.
- matt paint from la pajarita, in this case we used beau bleu, jade e igloo colors.
- brushes (at least 3)
- paper towels
- white glue.
Ready?
 .
.
.
.
Step 1:
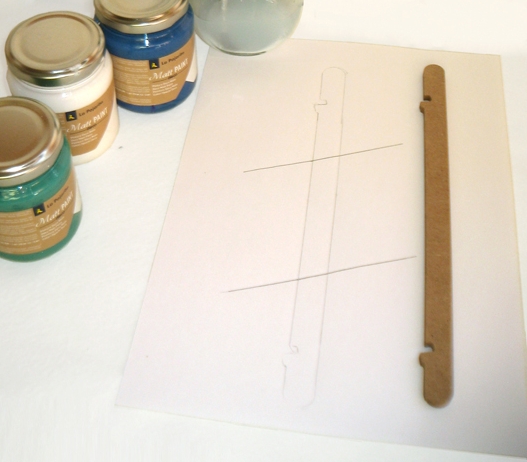
We make a template in paper or cardboard with one of the rods of the lamp and a pencil and we mark 3 thirds, each one will go in one of the chosen 3 colors and we will make a transition between them.
With the template what we will get is that the shading is more or less in the same place in all the rods, although it will not be exactly the same in all, but it does not matter, we want to show that it is handmade.
.
.
.
.
.
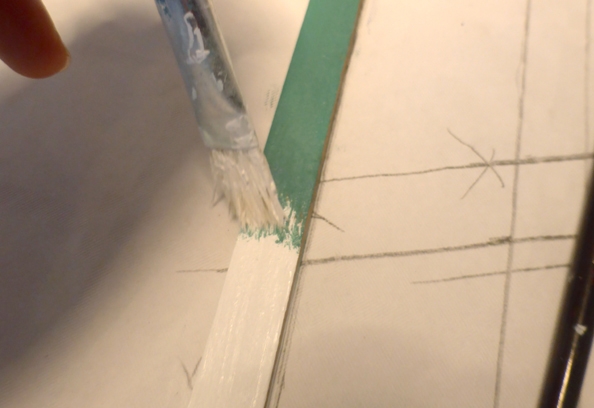
Step 2:
We paint every third of a color trying to respect those marks that we have made in the template, I think the picture clearly shows what I mean, with this type of painting is also very easy, as it is very dense.
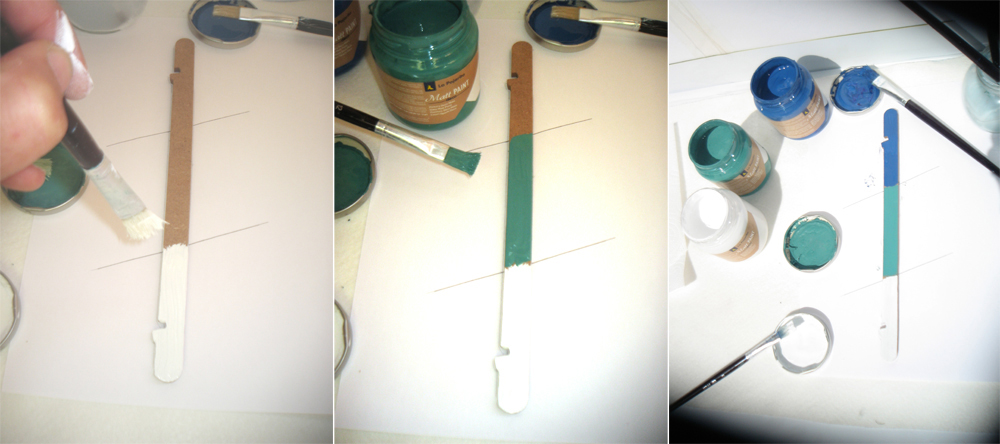
We will do it on both sides and the outside of the rods, I painted the inside white, but I would advise you to make them also in gradient, it is easier.

.
.
.
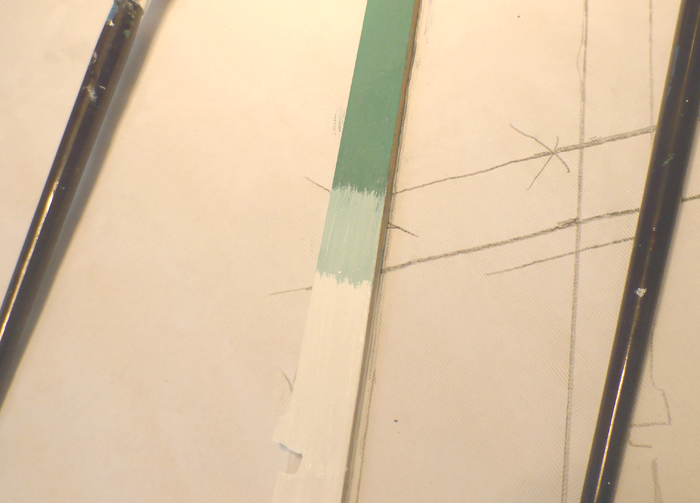
Step 3:
With the brush of the darker color of the two that we want to mix and almost dry we surpassed a little that third that we had marked.
You are starting the paint ombre.
.
.
.
.
.
Step 4:
With the brush of the lighter color we do the same in the opposite direction .
This is the second step of the paint ombre.
.
.
 .
.
.
.
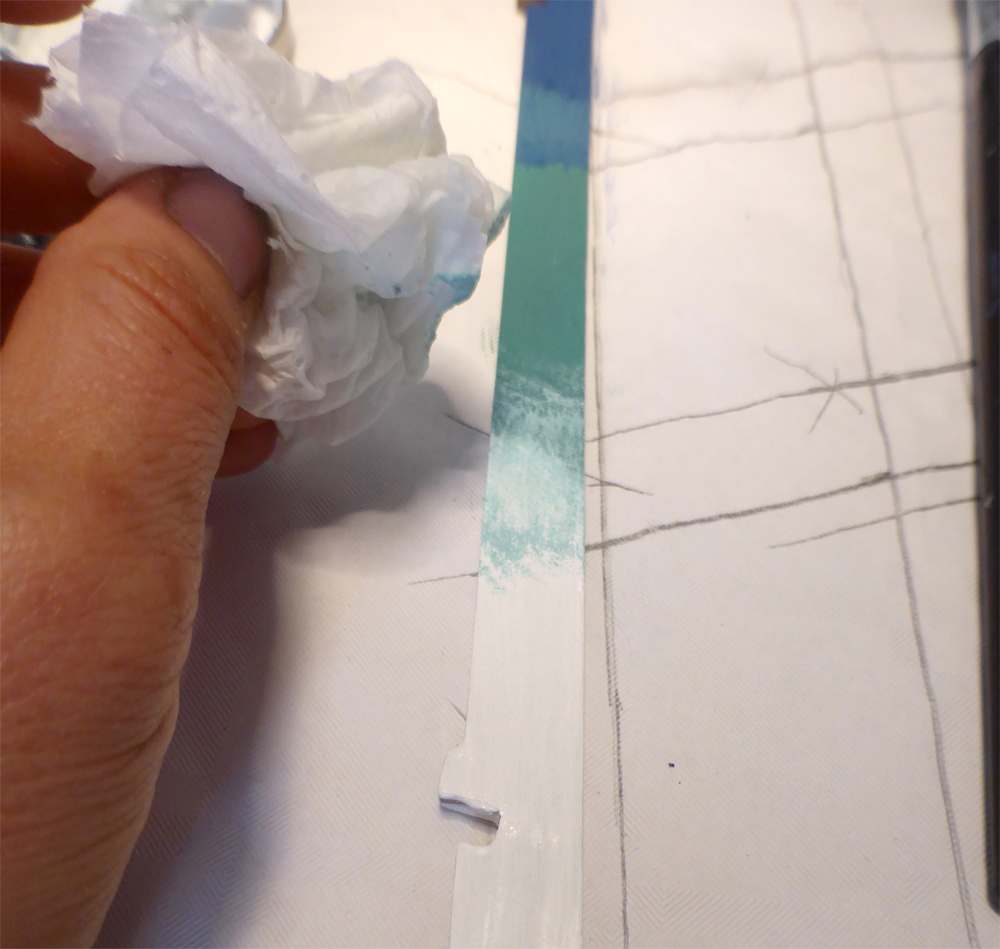
Step 5:
With a brush without paint but wet we mix both colors, although if I am honest I did it with the fingers, I find it more comfortable and this paint is cleaned perfectly with soap and water, it is not like the acrylic that it is necessary to insist if it stays dry, has texture similar to tippex.
.
.
.
.
.
.
Step 6:
When the paint is almost dry (which is right away) Press lightly with kitchen paper blurring it a bit, do not reuse the paper to make the other gradient of paint that carries the rod, which goes from green to blue, because it will mix with some of the white and it would not look good.
.
.
..
.
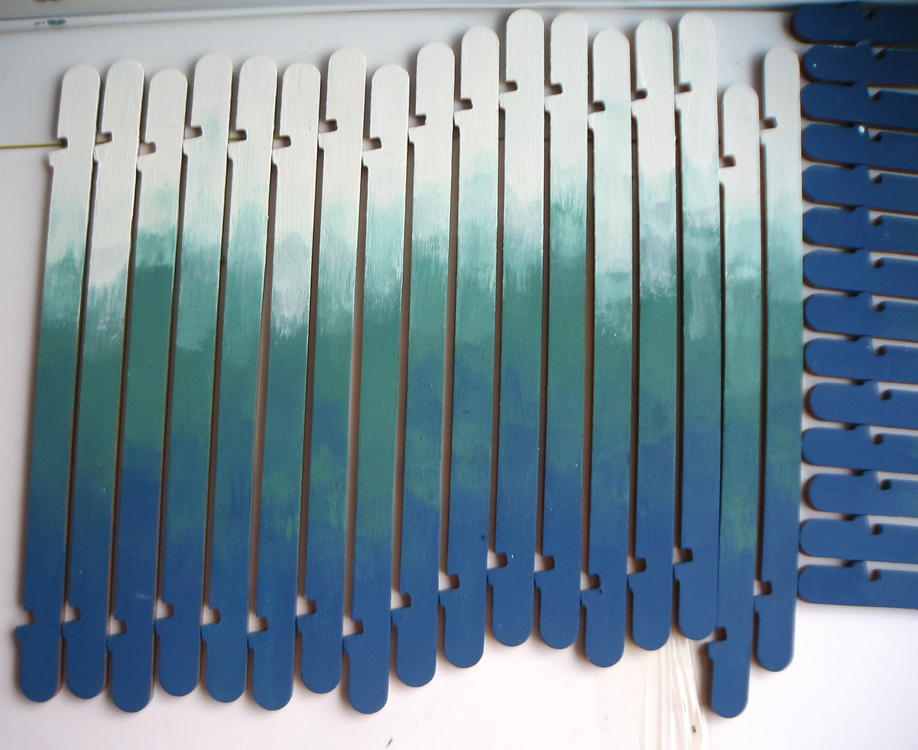 Paint ombre done!
Step 7:
Paint the two “skeletons” of the lamp, in this case I chose to paint them in the tone in which I had painted the rods in that area, so the top was dark blue and the bottom white, but you can play to do as you want.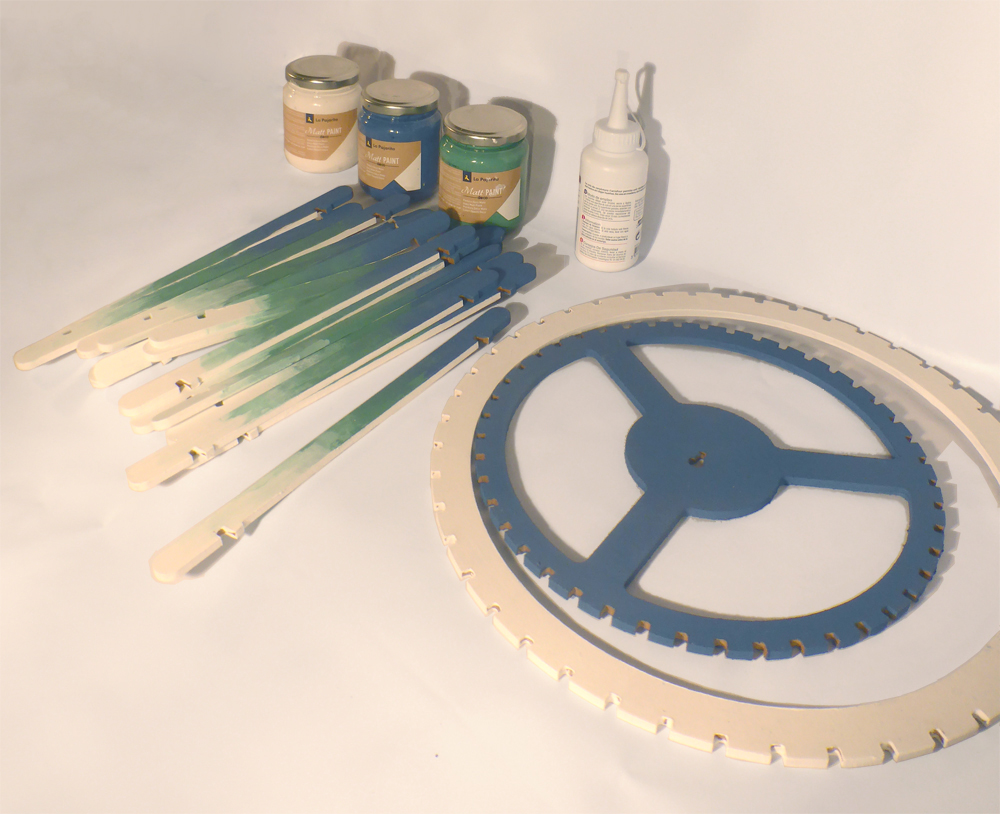
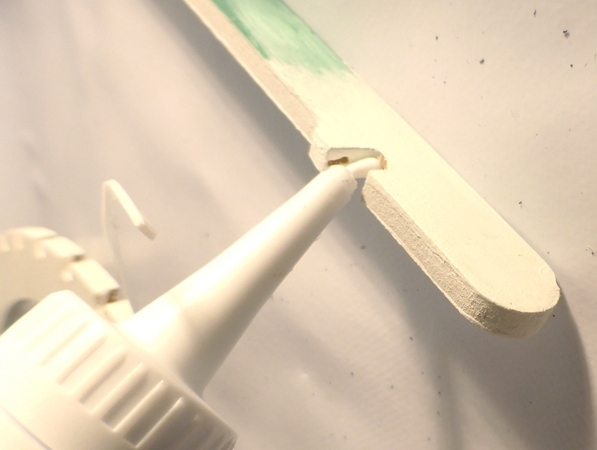
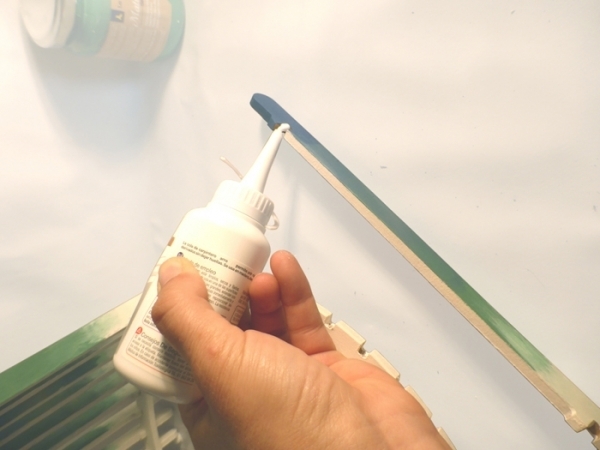
Step 8:
Once you have made all the rods just place a glue droplet in the notches and place them in the two skeletons, the only thing you have to do is to place three without gluing them so that they work as temporary “legs” and go putting consecutively those you glue, that means side by side (if you don´t you run the risk of twisting the lamp and once glued it is difficult to take it off).
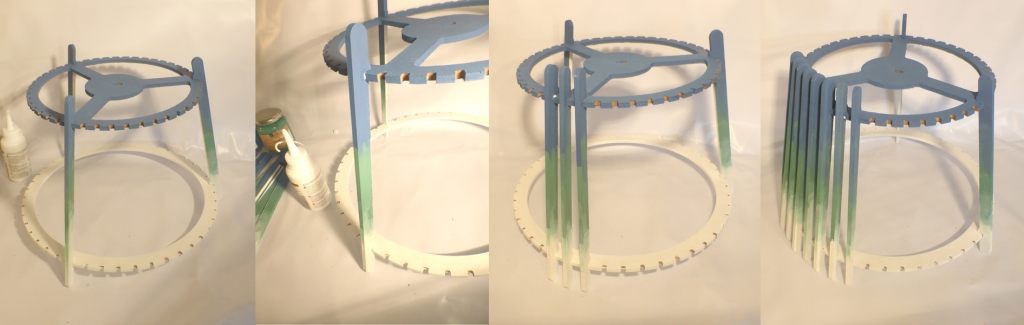
Colocar unas varillas como patas y empezar a pegar las varillas de manera consecutiva
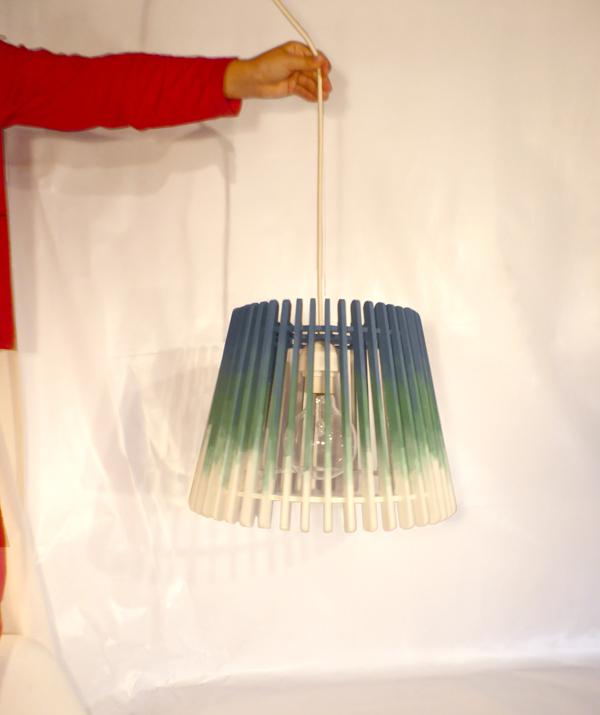 Ready!


Leave A Comment